3D with SceneKit
SceneKit is a high level 3D framework for Mountain Lion1 that was introduced almost a year ago at WWDC 12. It is all Objective-C and integrates with other UI frameworks like Cocoa and Core Animation. This means that you can use normal NSColors, NSImages and CATransform3Ds to configure your 3D scene. It also means that you can easily animate property changes, like for example position or transform, using a regular CAAnimations and addAnimation:forKey:. Sounds amazing? It is.
Shortly after it was introduced Jeff LaMarche wrote a great Introduction to SceneKit. Since then it has mostly been quiet — at the time of this writing SceneKit has only 12 questions asked on Stack Overflow — until recently when (once again) Jeff LaMarche gave a presentation at CocoaConf San Jose with a lot of sample code available on GitHub and Delicious Library 3 launched with 3D shelves made using SceneKit. SceneKit may have been launched at the wrong time, in the middle of the debate about skeuomorphism but I think it’s a great framework and I’m also going to try to show why that is.
The basics of a scene
The mental model of SceneKit is similar to how you would think of a scene in real life, and similar to that of OpenGL 1 if you ever used it. A scene is composed of geometry with different material that is lit up by lights and seen through a camera. These nouns correspond to the classes SCNScene, SCNGeometry, SCNMaterial, SCNLight and SCNCamera. There wouldn’t be much of a 3D scene without the ability to position and rotate any of these elements but neither of them have a position or transform property. That is where nodes come in.
Nodes
Nodes, instances of SCNNode, are the backbone of a scene. Think of them like a plain layer but in 3D. Nodes are hierarchical and you can add, insert, replace and remove child nodes using
addChildNode:insertChildNode:atIndex:replaceChildNode:with:removeFromParentNode
There resemblance to layer hierarchies in 2D is obvious.
Nodes are positioned relative to their parent node using the position property that unlike its 2D equivalent takes a SCNVector3 instead of a CGPoint. Don’t let the vector name scare you, it’s just a 3D coordinate (x, y, z)2. The transform property takes a normal CATransform3D (transforms were 3D even in the 2D world of layers) but there are also convenience properties for the scale and rotation that automatically change when the transform is set and vice versa. There is also a 3D equivalent to the anchor point called the pivot that influences position and transform just like the anchor point does.
A node in itself is nothing but an empty container but each node has properties to have a geometry, a light, or a camera attached to it.
A basic scene
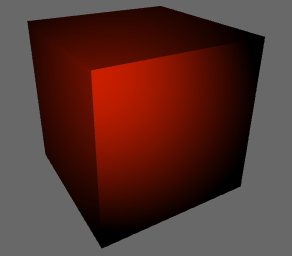
A scene is displayed in a SCNView. The node hierarchy is attached to the scenes rootNode. In this minimal example we create a single box with a single red spotlight and move both the spotlight and the camera back and up from the center of the scene. To give the effect that the spotlight is next to the camera we add the spotlight node to the camera node and offset it slightly. The box remains centered in the scene. This is all the code it takes:
// An empty scene
SCNScene *scene = [SCNScene scene];
self.scene = scene;

// A camera
SCNNode *cameraNode = [SCNNode node];
cameraNode.camera = [SCNCamera camera];
cameraNode.position = SCNVector3Make(0, 15, 30);
cameraNode.transform = CATransform3DRotate(cameraNode.transform,
                                           -M_PI/7.0,
                                           1, 0, 0);

[scene.rootNode addChildNode:cameraNode];

// A spotlight
SCNLight *spotLight = [SCNLight light];
spotLight.type = SCNLightTypeSpot;
spotLight.color = [NSColor redColor];
SCNNode *spotLightNode = [SCNNode node];
spotLightNode.light = spotLight;
spotLightNode.position = SCNVector3Make(-2, 1, 0);

[cameraNode addChildNode:spotLightNode];

// A square box
CGFloat boxSide = 15.0;
SCNBox *box = [SCNBox boxWithWidth:boxSide
                            height:boxSide
                            length:boxSide
                     chamferRadius:0];
SCNNode *boxNode = [SCNNode nodeWithGeometry:box];
boxNode.transform = CATransform3DMakeRotation(M_PI_2/3, 0, 1, 0);

[scene.rootNode addChildNode:boxNode];
And the result is something like this

Core Animation
My absolute favorite part of SceneKit is the excellent integration with Core Animation (which still remains my favorite framework). That integration comes in two parts: properties in SceneKit can be animated using CAAnimations3 and layers can be used as content (textures) of SceneKit materials.
Animating scene properties
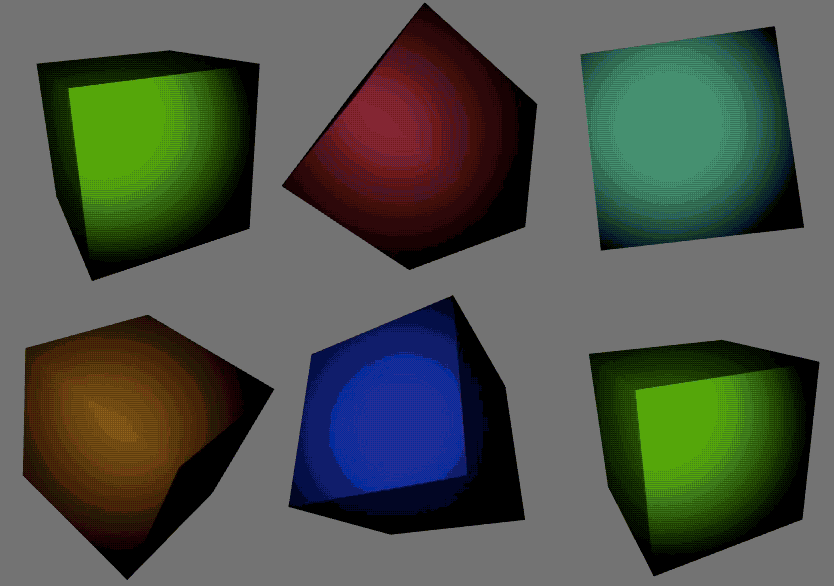
Animations in SceneKit works just like Core Animation have always worked. I could be done with just that sentence but let’s do an example just to see how cool and powerful it is. Let’s take the very static example above and bring it to life by animating the rotation of the box and the color of the spotlight.
We want to animate the color property of the spotlight and the transform property of the box node. We create two animations for the two key paths and add them to the light and the box node.
// Changing the color of the spotlight
CAKeyframeAnimation *spotColor =
  [CAKeyframeAnimation animationWithKeyPath:@"color"];
spotColor.values = @[(id)[NSColor redColor],
                     (id)[NSColor blueColor],
                     (id)[NSColor greenColor],
                     (id)[NSColor redColor]];
spotColor.timingFunction =
  [CAMediaTimingFunction functionWithName:kCAMediaTimingFunctionLinear];
spotColor.repeatCount = INFINITY;
spotColor.duration = 3.0;

[spotLight addAnimation:spotColor
                 forKey:@"ChangeTheColorOfTheSpot"];

// Rotating the box
CABasicAnimation *boxRotation =
  [CABasicAnimation animationWithKeyPath:@"transform"];
boxRotation.toValue =
  [NSValue valueWithCATransform3D:CATransform3DRotate(boxNode.transform,
                                                      M_PI,
                                                      1, 1, 0)];
boxRotation.timingFunction =
  [CAMediaTimingFunction functionWithName:kCAMediaTimingFunctionLinear];
boxRotation.repeatCount = INFINITY;
boxRotation.duration = 2.0;

[boxNode addAnimation:boxRotation
               forKey:@"RotateTheBox"];
And now the scene looks like this

Layers as content
The second part of the Core Animation integration is that layers can be used the content of materials. The most basic example of this would be to use a layer as the texture of a material. Apple uses this to great effect in the SceneKit session from WWDC 12 (504) when they animated photos inside of 3D photo frames (at the 40:53 minute mark and forward). More advanced visual effects could be achieved by using the layer as the content of for example the specular part of the material.
All the other cool stuff
This is just a scratch on the surface of the capabilities of SceneKit.
For example: fully configured scenes with geometry, materials, lights, cameras and animations that a designer has exported as a .DEA-file can be imported in a single line of code sceneWithURL:options:error:. There is also support for hit testing in 3D (you see it in action when dragging items around in Delicious Library 3).
When necessary a material can be rendered using custom vertex shaders and fragment shaders (GLSL). If that isn’t powerful enough there are render delegates that allow both complete custom OpenGL rendering of single nodes and post-processing and pre-processing of the entire scene using callbacks like renderNode:renderer:arguments: or renderer:didRenderScene:atTime:.
If you haven’t already, I recommend that you take a look at what Jeff LaMache has already written about SceneKit and watch the WWDC video about SceneKit. The very simple sample code for this post can be found on GitHub.
-
Yes, this post is for OS X and not iOS. (One can only hope for something nice for WWDC 13) ↩
-
I previously explained vectors (and matrices) in a post about the math behind transforms. ↩
-
To be completely honest, only having this part of the Core Animation would still be amazing. ↩